*We are a reader-supported website. When you buy through links on our site, we may earn a small affiliate commission at no extra cost to you. Home Media Entertainment does not accept money for reviews.*
In any home entertainment setup the two most important elements are obviously the picture and sound. And although in both of them there are different technologies nowadays, it was always the sound that was the most tricky part and this happens because there are a lot of components that need to work together in order to get the sound as it was intended by the film makers. And to make matters even worse every room, home theater and media area is unique making their acoustics different adding more difficulty to an already complex situation. In our Dolby Atmos speaker placement guide we are going to shed some light and make things a bit more clear on all these.
A very frequent question we were hearing was “How do I position my speakers to have the best sound?”. This question was already difficult because of the different speakers setups that existed up to now with the most common ones being 5.1 and 7.1 channels setups (we will explain in a bit what these numbers mean). And with the different rooms each user had things were not as clear cut as we would like.

But now as the new 4K UHD format is mainstream we have new audio formats also to make things even more complex. And the question we hear now has changed to “How to make a correct Dolby Atmos speaker placement”. With Blu-ray the best in audio formats were Dolby TrueHD and DTS-HD Master audio. These 2 formats were offering 5.1 and 7.1 mixes for movies and a lot of times you could find multiple audio tracks to choose from.
Let’s explain a bit what these numbers mean. As you can see in the graphic below a 5.1 channels setup consists of 1 center dialogue speaker, 2 front speakers and 2 back surround speakers along with a sub woofer for the low frequency sounds. A 7.1 setup is similar with the exception that it is adding 2 more speakers, one on the left and one on the right side of the viewer. Now what is very important to understand is that with these 2 setups all speakers are positioned at the height of the viewers ear. This means that while we were getting a 360 degrees immersion soundstage there was a lack of information above us.
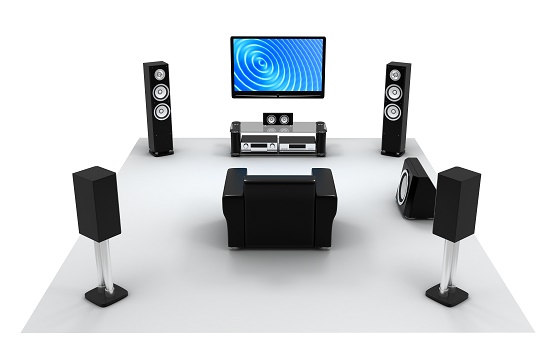
And this was happening because these audio formats lacked any support for channels that could be positioned anywhere above ear level. This was rectified with the new audio formats that are Dolby Atmos and DTS:X. Now we can get sounds not only around us but also above us. And while DTS:X is claiming that this can be achieved with your existing home cinema setups, Dolby requires a new setup to take advantage of the extra sound sources.
You probably have heard that these new formats are called “object oriented”. This means that each soundtrack that comes with a movie is not mixed for a specific number of channels. If you have ever paid attention to a Blu-ray disc you probably have seen it writing for example DTS-HD Master Audio 7.1. This meant that the film’s soundtrack was mixed specifically for a 7.1 channels setup. If your system was different it was up to the AV receiver or amplifier to distribute the mix according to the speakers that were available.
Now with Dolby Atmos and DTS:X you will not see that. The description will only mention “Dolby Atmos” or “DTS:X”. This happens because these soundtracks are mixed with specific channels in mind. The mixers are placing audio sources in 3D space and the amplifier/AV receiver that supports these format has the duty of rendering the sound according to the speaker setup that is available.
Now adding new channels meant that we needed a new number coding in order to be able to describe them. Therefore we got new names for these setups as 5.1.2 and 5.1.4 for example. Adding new speakers in your home cinema area is not always an easy task as many of us don’t have dedicated rooms for our home entertainment system. With DTS:X we don’t have this problem as the developers claim that current surround setups like 5.1 or 7.1 channels will do but with Dolby Atmos there is only one way. The need for overhead sound needed an audio source that originates from above. That’s why companies are offering nowadays two different solutions to this problem.
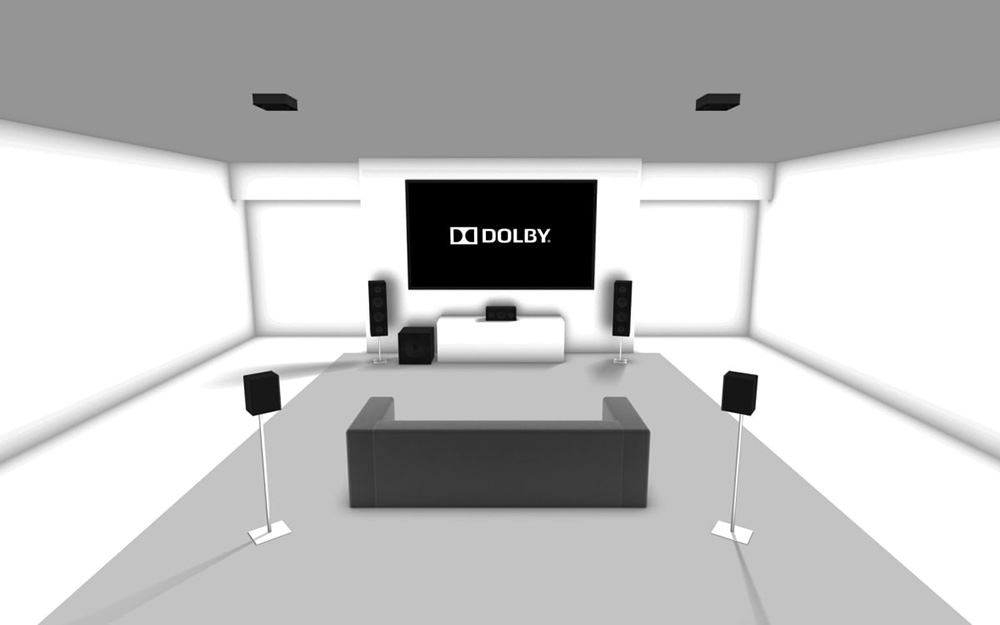
Obviously the most straightforward option is to add speakers on the ceiling in either a two or four channels configurations. This provides the best solution as the sound source is really where it should and you get better resolution and clarity from the Atmos effects.
A normal 5.1.2 setup consists of 2 extra ceiling speakers that will bring the sounds from above as you can see in the photo below. With 5.1.4 we have 4 extra speakers, 2 on the front and 2 above the rear speakers. How many speakers you are going to use is up to your space, your room configuration and obviously your budget. If you can go for 4 overhead speakers then this will get you the best possible results but if either your room doesn’t allow for that or your budget is limited then even two of them will do a very good job in this regard.
Now when it comes to 2 overhead speakers all AV receivers/amplifier provide several placement options in their setup. These can be either on top of the front, in the middle of your listening area, on top of the surrounds or even placing them on the wall above the front speakers. The best placement for only two ceiling speaker is certainly in the middle of your listening area as they will be able to cover more space in your home theater. But as always this also depends on your room.
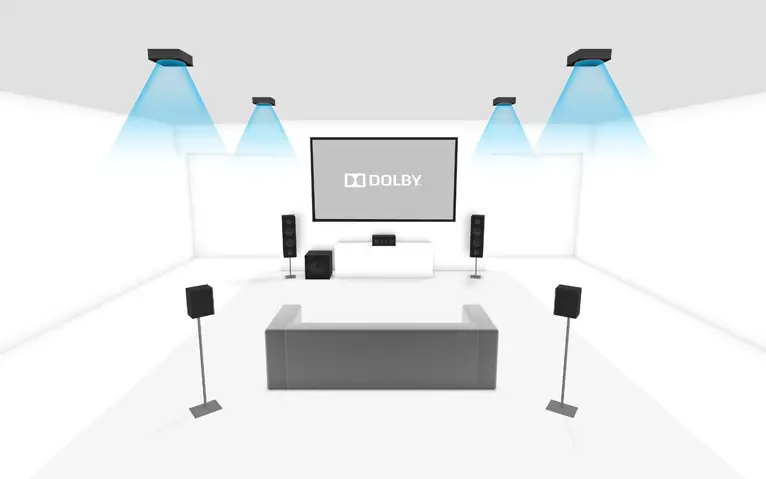
But there is also an alternative if the option to add speakers on your ceiling is out of the question. Manufacturers understand that your house is not an ideal environment as a cinema is so they had to become creative in this regard. And for this reason they created front speakers with an extra driver that are targeting the ceiling of you room. The sound that emits from these up-firing drivers will bounce on the ceiling and will come down to you as if they would originally come from the top. Now this technology may not produce the same results as having dedicated ceiling speakers, but it gives most people an alternative if they are not able to place these extra sound sources.
Now this technology is an interesting one especially if you consider how much trouble it can save you from adding more speakers and more cables around your house but as with everything there is a catch. As the sound doesn’t originate from the ceiling and is based on the bouncing effect the overall result feels less accurate, not as pronounced and the Atmos effects have less elevation at best.
But it’s not only the resulting sound that is less than ideal. In order for this technique to work as efficiently as possible your room must meet certain design requirements. First of all you need to have a straight ceiling because when the sound bounces on it, it will come down to you on a angle, and this angle must be specific in order for the sound to come down exactly to your sitting position.
Also the more the sound travels the more it looses its energy. So if you have a very high ceiling the Atmos effects will not have the same strength or refinement. The lower the ceiling the more pronounced these effects will be. Although there is no direct answer to this the general rule is your ceiling should not be more than 9 feet (3 meters) high in order to get the best result.
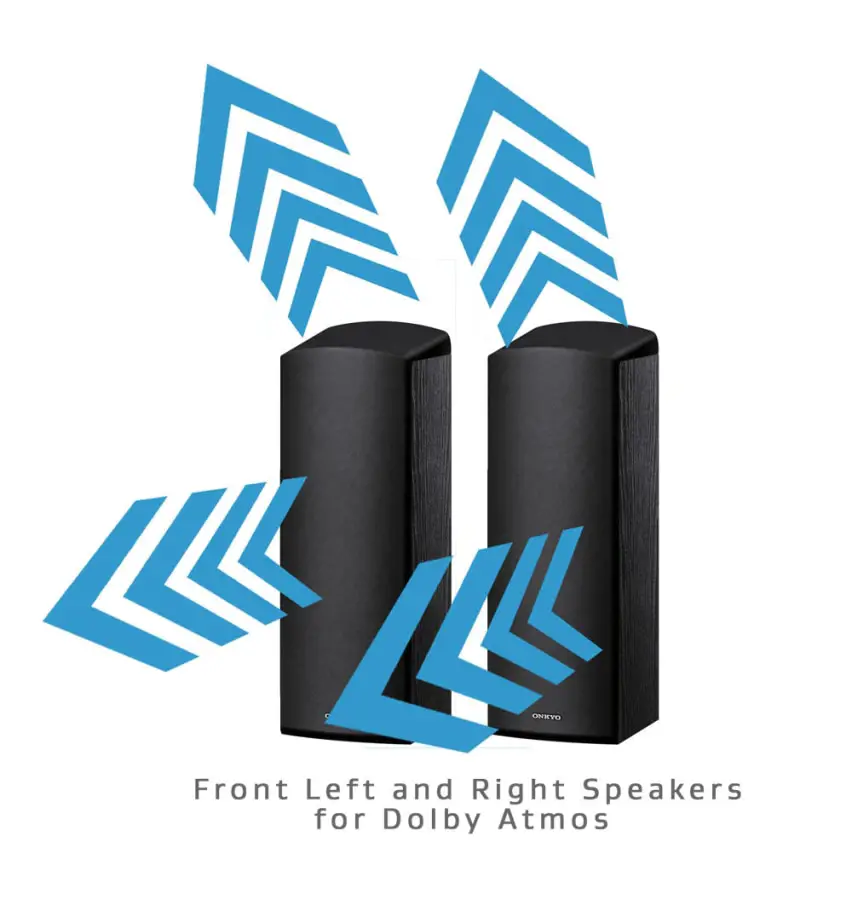
There are speaker setups for both 5.1.2 and 5.1.4 using this alternate technology with some of them using up-firing drivers only for the front channels while there are now many systems with up-firing drivers on the surround speakers also. I will not compare it with a true 5.1.2 system with dedicated ceiling speakers as it is a given that the quality will not be the same but we are sure that for a lot of people this will be a very practical solution, one that will save them from adding speakers in uncomfortable positions. Because let’s be honest here, most of us are using our living rooms for our home cinemas and for sure we envy the few lucky ones that have dedicated spaces for their home entertainment systems.
And as time goes by we see this becoming more and more usual in soundbars also. Soundbars in general are for those that want an easy to use setup or for those that don’t have the necessary space to go for a full dedicated audio system. And we can see now that manufacturers are using up-firing drivers in their new models also showing that this technology is not smokes and mirrors but can really provide a genuine, even if not the same in quality, Dolby Atmos experience.
And while in the beginning we were seeing up-firing drivers being utilized only for the front lately we see a few soundbar flagships going for up-firing speakers in their surround channels also showing how much they believe in this design. The LG SN11RG is one such example that we had tested recently and you can read our full review on the name link.
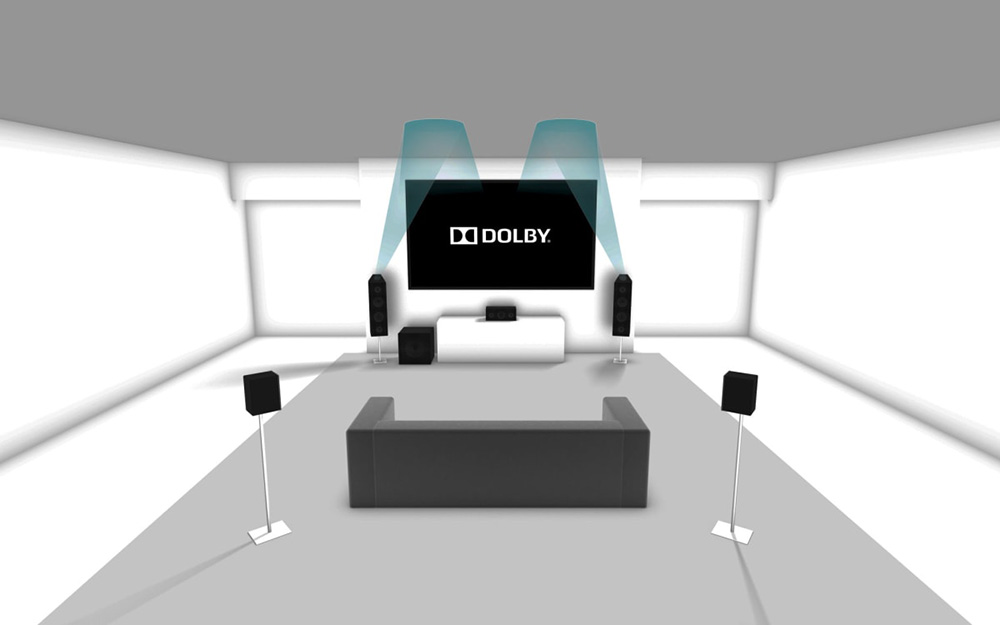
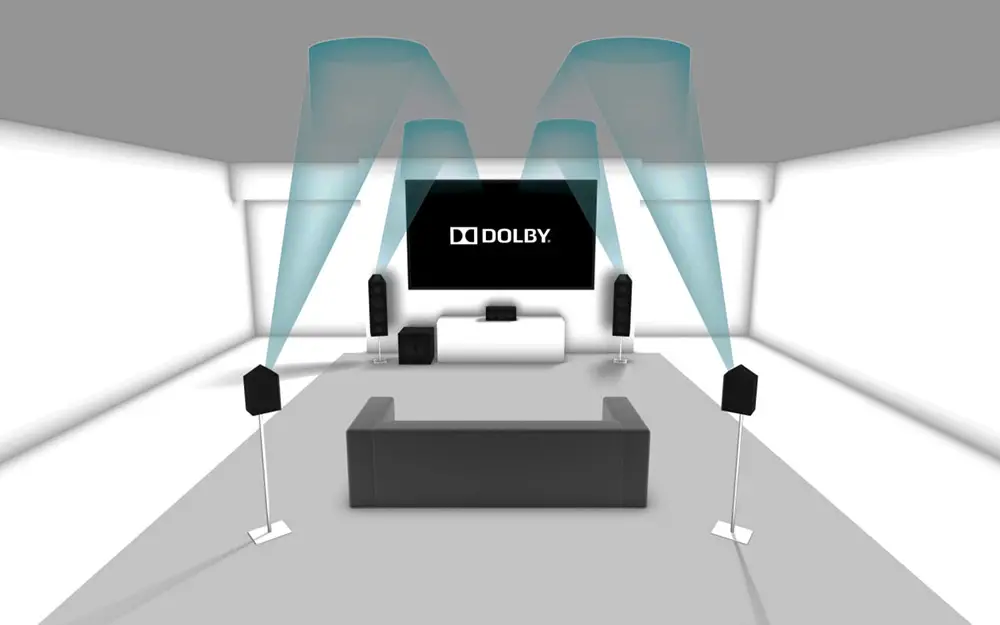
So if you want to create a new home entertainment system and want to know how to make a Dolby Atmos speaker placement what you should really pay attention at is first what type of technology you prefer. You will go for dedicated ceiling speakers or you will go for up-firing speakers from the main 5.1 setup? If you go for the second solution then things are pretty simple as the speakers are fixed so no need to do anything. But if you decide to go the first root then you have a lot of options. Almost all new AV receivers that support Dolby Atmos and DTS:X give you a variety of setups for the ceiling speakers. You can add a single speaker in the middle of the area. If you want to add 2 of them then you get the option to place them either on top of the front speakers, to place them in the middle or above the rear speakers. Now what to choose is up to you and it depends also what your room allows. But if we had to choose we would either place them on top of the front speakers or in the middle to have the best results.
Now if you go for dedicated speaker setups you don’t need any specific speakers types as any speaker looking downward can do the job. It all depends on the quality and the looks of the speakers you will choose. But if you choose a setup that has up firing speakers integrated in the main speakers then your options are more limited but still you have enough options to choose from depending on size and quality.
In the beginning these were few and far between but now you can find plenty of designs, either in a floorstanding design or bookshelf speaker. Many manufacturers like Dali, Monitor Audio or KEF are even making dedicated Atmos speakers that are designed in such a way that you can either attach them on the ceiling or place them directly on top of your floorstanding or bookshelf speakers if you prefer to go for an up-firing Dolby Atmos system and look as an extension of your main speakers.
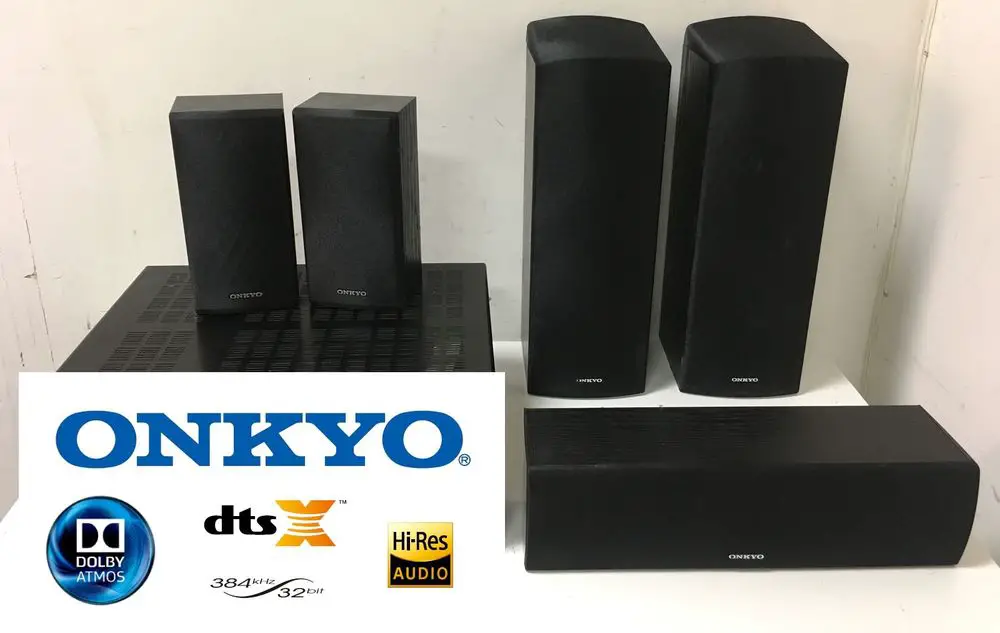
Pioneer and Onkyo are 2 companies that have created some low cost, entry level 5.1.4 and 5.1.2 setups with up firing speakers integrated in the main speakers.
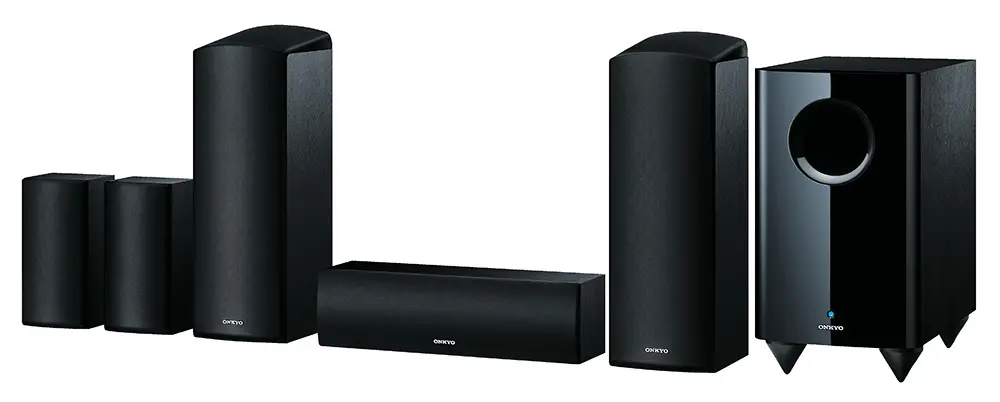
The Onkyo SKSHT588 5.1.2 Dolby Atmos system for example is one and this is a great setup if you are looking at an entry level quality speaker setup that supports the new formats. Although it has only 2 up firing front speakers it really fills the area above the ear level and creates a far better hearing experience than the normal 5.1 setup. You can read my review on this speakers setup HERE.
But you don’t have to go with such a full system. There is a wide variety of floorstanders that come with up-firing drivers if you prefer for a more expensive solution. It’s all a matter of budget and space limitations that will decide your final choices. The Onkyo system we mentioned above is an excellent solution for small rooms and for those that have a low budget as it can provide a very nice Atmos experience on a budget.
Ending this article we would like to summarize a few things. Before you decide what to buy you have to see what your area can support and secondly how much money are you willing to spend. These 2 factors will determine what final options you will be able to choose from. In this article we saw most of the basic setups and what alternatives there are with the up-firing speakers that can save you some serious money.
If money is not a problem then by all means go for a 5.1.4 or even a 7.1.4 channels setup with dedicated ceiling speakers. But if your budget is tight and placing extra speakers in the ceiling is out of the question then the Onkyo setup or Atmos speakers that can be placed on top of your main speakers or with integrated up-firing drivers is the way to go. When Dolby Atmos and DTS:X first came out there were limited choices in terms of what you could find on the market but as time passes by we see more and more options which is only good for the consumer as with more options come better prices.
For more guides you can check our dedicated Guides list.
Thanks for sharing the information in your post. I finally finished my basement, and my next step is to start shopping for a sound system. Your insight is appreciated. I am not audio savvy, and you have given me a starting point. I have been reading up on audio systems and have found that it comes down to my budget. I currently have a primary Bose sound system and like it very much. I would like to upgrade to a system that has four speakers or more.
I’m glad I stumbled on your website because it clarified the type of audio system I believe I would be a lot happier using. I am going to hold off and save my money to buy the better audio system.
Thanks
Kevin
Hello Kevin. I am glad that i helped a bit to make things more clear for you. If you have any questions or need any help with buying your new sound system i will be happy to help you. You can write here in the comments or by sending me an email. Have a nice day!
Hello there! I just moved to my new apartment and I want to make a mini home theater. I read your article about the proper placement for speaker to have the perfect audio. I found your guide really informative and helpful because I don’t have a speaker yet and I found out that the Onkyo SKSHT588 5.1.2 Dolby Atmos Ready Speakers are great speakers that is compatible with dolby atmos. I will surely buy one of this and have a great time with my entertainment area.
Hello John. If you are tight with budget but you want a new speaker setup the one i suggested is very good. But in general getting a speaker setup with integrated up firing speakers will save you some money and trouble from placing them in the ceiling. I am glad that i helped you and if you need any other help feel free to reply to this topic.
Loads of good tips here. In my case, I can’t install speakers in the ceiling. However, my ceiling is high and I’m wondering if mounting the Atmos speakers high on the walls would deliver a worthy effect. Any experience with this? Thanks!
Hello Santiago. In fact you can. Using ceiling speakers is obviously the best way possible but this is not possible for a vast majority of users. As such using height speakers instead will work in a very similar fashion. Try to place the speakers as close to the ceiling as possible. Also you can use speakers specially designed for something like this like the SVS prime elevation or the Dali Alteco C-1.